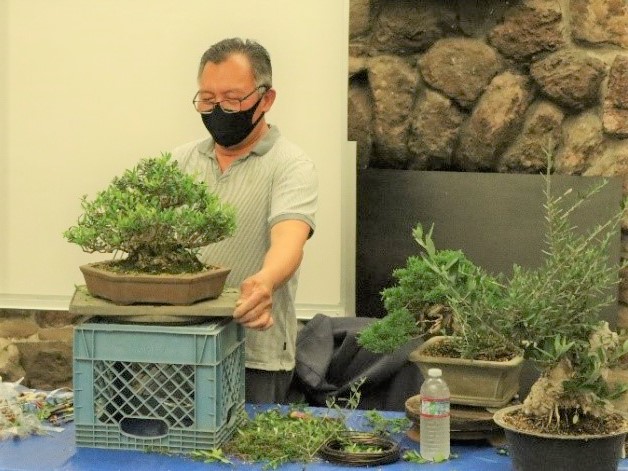
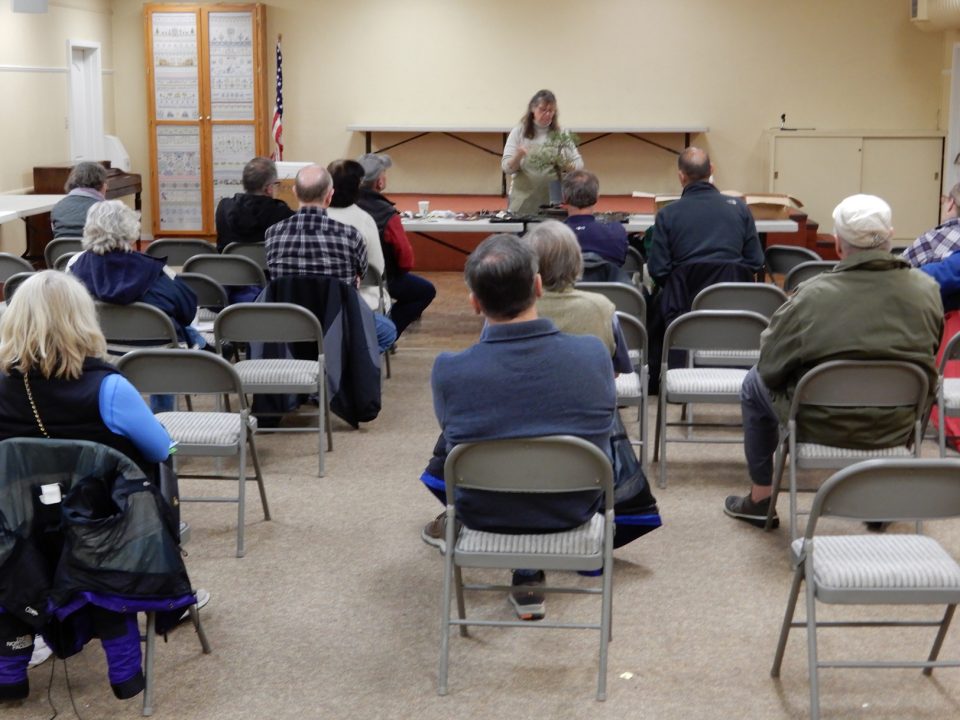
Demonstration by Boon Manakitivipart – Common Olive & Shimpaku Juniper

REBS was privileged to have internationally acclaimed bonsai artist Boon Manakitivipart present the program at our May 26, 2022 meeting. Boon gave us a bit of his personal bonsai history as an introduction, detailing his first frustrating efforts in the 1980’s to even get his trees to live, and his opportunities beginning in the early 1990’s to study in Japan and learn from masters there. Boon spoke of apprenticing in gardens that specialized in Japanese Black Pines and the wealth of high quality material there to study and work on. During his training he had the opportunity to work on several trees that subsequently won top prizes at the Kokufu show in Japan. He has carried this love and study of JBP and bonsai in general to his work in the US at his gardens outside Sacramento, California.

Boon worked on three trees during his presentation, the first an olive. He explained that olives with big leaves are referred to as Mission Olives or Common Olives. These will bear fruit, but those with small leaves do not. Olives are easy to collect locally in old orchards or neighbors’ yards, and if you have a good trunk of a common olive the smaller foliage of the small leaved variety can be grafted on from cuttings. In the wild olives have no shape to the foliage, they just look shaggy, but they can have wonderful chunky trunks which make dramatic bonsai when the branches are directed with wire. Branches are grown out for girth and pruned to the desired shape when the tree is full and healthy. On more mature trees pinching will help keep the tree in shape, but Boon warned not to take all the new growth off. When pinching and cutting back in the spring it is important to leave some growing tips so the branch won’t die. During spring cleanup old leaves and downward pointing leaves can be removed to better show good branching and ramification. Also be sure to remove the suckers on the trunk. In styling an olive Boon suggests leaving the top a little fuller. Overall, the ideal is a triangular shape with a slightly rounded top, and it is important to keep the tree looking balanced.

In his bonsai journey finding the right potting soil for his trees was a big challenge for Boon. Now we have easy access to Akadama clay from Japan and premixed soils with lava and pumice as well, but when Boon started those materials were not available in the US and the prevailing “wisdom” here was to include some organics in the soil mix, like orchid bark or peat moss. His trees were failing because the soil became too wet, compromising the health of the trees, so he read everything he could find about soil, including every issue of Bonsai Today from the very beginning of its publication. It took years of experimenting with many combinations before Boon found the blend he favors, which is Akadama/lava/pumice with about 5% decomposed granite. This last ingredient is similar to the sand the Japanese refer to in their mixes. Boon includes it based on his observations of the natural habitat of junipers and pines in the mountains where they grow well in granite.

The second tree Boon worked on was a small, healthy shimpaku juniper. He used this tree to illustrate the importance of balancing growth in a bonsai and keeping the tree developing new branches with proper pruning techniques. Boon was cutting the long shoots on this tree at this time pointing out how evenly distributed they were on the tree which indicates optimal, balanced growth. He was not going through the tree taking off all the green tips. Long ago this was what local teachers recommended, but it stunted the growth of trees because these growing tips are what is needed to keep the tree vibrant and healthy. You also don’t want to prune a juniper, or any tree, at the wrong time which can also slow the growth or result in branches dying off. Boon mentioned that many bonsai hobbyists work on their trees too much or take off too many of the important growing tips. The result is prickly juvenile growth which is usually not desired, and little or no branch development. If this has happened on our trees, he suggests letting them grow out for at least a year and starting again with the pruning when the mature growth has returned. Weaker branches should be allowed to grow without pruning.

Boon saved the raffle tree for last, an olive whose trunk is a  “nice chunk of lumber”. This is a collected common olive with the larger leaves, but Boon had grafted cuttings of a smaller leaf olive in strategic places on the branches. He talked about the 30-40 year old tree and how the trunk could be made to look older and given more character with some carving. He recommends hand tools which encourages a slow approach, stepping back and reviewing the work before moving on, resulting in a more natural look. The grafts had pieces of blue painters’ tape on them which acts as shade cloth for the graft and keeps them moist as they grow.  Boon suggested we all need to learn to let our trees grow, not overwork them and allow them to have a more natural aspect. The ultimate goal for this tree is to make it look like it came from the mountains.

Diane Matzen was the lucky winner of the raffle and picked up a few more growing tips at Boon’s workshop the next day. We want to thank Boon for an inspiring talk and sharing his expertise and wisdom with us.

Write up by Candace Key

Boon is a past apprentice of Kihachiro Kamia of Japan and Boon has many students as well as private clients throughout the country and the world. He has developed several now common bonsai practices including the 1:1:1 soil mix (Boon’s mix) and half bareroot repotting technique.

He first trimmed a developed olive by removing all of the six inch long spring growth back to one or two sets of leaves. This will encourage new growth and shorter internodes that will be refined later in the growing season.
Boon then explained how juniper should be grown strong enough to produce long extending tip growth. Only when the extending tip growth goes well beyond the silhouette should the tip be cut back to the silhouette. Clean all growth below each pad and never pinch tip growth on a juniper. You can cut the one extending long strong tip.
 
This is the olive stump before any work. A large stump with large leaf and small leaf growth. The large leaves are from the stump of the commercial (fruiting) olive. The small leaf growth has been grafted from a seed grown plant which does not produce fruit. Boon then removed much growth and placed several more grafts on.
This is the grafting technique Boon uses now. The graft is a two pair leaf cutting inside the plastic bag with wet sphagnum moss. The bag tied closed with a long copper wire and the graft stick end poking out of a corner of the bag. These can be prepared ahead of time. The graft stick is cut on both sides forming a “V” which is inserted into a slice of a short branch. The graft is tied to the branch tightly with stretchy plastic tape. The wire is used to secure the graft to the end of the short branch. If the bag dries out, you can put more water in using a syringe and needle to keep it moist. Painter’s tape can be put on top of the bag to act as shade cover until the graft begins to extend.
At the end of the evening the newly grafted stump was raffled off to Diane Matzen.
Diane Matzen and Boon Manakitivipart

Photographs and captions by Michael Murtaugh

Demonstration by Jonas Dupuich – Exposed Root Japanese Black Pine

On February 25, 2020, at the Luther Burbank Art and Garden Center, Santa Rosa, California, Jonas Dupuich was the guest bonsai artist and instructor for the members of Redwood Empire Bonsai Society (REBS). Jonas demonstrated on creating and growing exposed root Japanese Black Pine bonsai. He has been growing Japanese Black Pine from seeds for the past 26 years. The exposed root bonsai technique is most popular with the Japanese dwarf flowering quince or Chojubai bonsai. It is used with Japanese Black Pine and Satsuki Azalea bonsai as well.

Jonas brought to the demonstration two of his own examples of mature exposed root Japanese Black Pine bonsai. Each 16 years in training, grown from seed. See photos.

In addition, he also brought Japanese Black Pine exposed root plants, one 10 years in training and the other one-year old, both from seed. These two plants were raffled upon completion of the demonstration. See photos.

Style – exposed root bonsai can be given the story as falling off the side of a cliff or even damaged from a flooding. It can be with long versus short roots depending on design. The roots may be thick and large or slim and small. There can be a certain balance of roots supporting the trunk.

Pots – suitable pots are usually round in shape and can be grey, red or brown.

Jonas began his demonstration with a slideshow depicting various exposed root Japanese Black Pine bonsai from a recent trip to the Kokufu Ten 2020 Exhibition and Green Room in Japan. The pictures showed different shapes and paths for the exposed roots. No one bonsai looked the same.

The first demonstration plant was the one-year old. Jonas used a one gallon nursery container and blocked the large holes in the bottom with construction sheet wall tape to prevent soil from leaking out. He then filled the bottom with a small bonsai soil mix (Clay King premix and pumice). Next, he inserted larger pieces of Japanese Hyuga (pumice). Jonas used a long nursery container popular with nurseries for Blueberry plants and placed it upside down (narrow bottom with a hole on the up side) in the one gallon container. By placing the second container upside down this would prevent the roots from growing wide to narrow or like a reverse taper. This second container was then filled with the Hyuga large pieces. Finally, the one year old Japanese Black Pine plant was inserted through the hole with all its roots attached. With the roots planted in the second container, it is then filled with more of the small bonsai soil mix. The latter will help keep the roots moist.

Jonas commented on watering by citing less water was needed. It should never be allowed to dry out completely.

Jonas said the planting should be checked three to five years later unless you want a smaller exposed root bonsai, like a Shohin. Once you established the size of the roots desired, then you must remove the small bonsai soil mix and large pieces of Hyuga. This is best done with a pick tool or chopsticks.

The exposed roots can be then manipulated in many ways to style your bonsai.

Jonas moved on to the 10-year old exposed root Japanese Black Pine demonstration tree. This plant was contained in a round terra cotta pot with the exposed roots partially planted inside plastic bonsai drainage screen material. The plant was allowed to grow without much attention. There were two large sacrifice branches for thickening the trunk still attached. A number of smaller branches were located near the base of the trunk.

Jonas first wanted to choose a front view and there were two options based on the shape and flow of the existing branches. The front view was marked with a chopstick. Of the smaller branches, two long branches near the base of the trunk were selected to wire. A single piece of Aluminum wire was used to wrap around the two branches. Starting at the back, Jonas wrapped the wire around the two long branches. He cut off several of the smallest branches as they were not needed. Once wiring was done, Jonas had REBS member Diane Matzen to establish movement in a downward direction and end facing the front view. Then, on the other wired branch REBS member Michael Murtaugh established movement in an upward direction, ending towards the front view. These wired branches gave the future owner choices in styling the bonsai, either downward for a cascade or upward for an informal upright style.

Jonas discussed the technique of bending branches and putting movement in the bonsai. He said bending should always start at the trunk and move in a downward or upward direction. There should be no flat wiring or straight areas. Always check your bending of branches afterwards and fix any straight areas. Black pine branches are very flexible but always support with your fingers the bends.

Upon completion of the demonstration, Diane Matzen won the 10-year old bonsai and REBS member Mike Nelson won the one-year old bonsai. Congratulations to both.

Demonstration by Kathy Shaner – Ginkgo biloba ‘Weeping Wonder’ Maidenhair Tree

On January 28, 2020, club sensei Kathy Shaner performed a demonstration for members of the Redwood Empire Bonsai Society (REBS) working on a Maidenhair tree ‘Weeping Wonder’ (Ginkgo biloba ‘Weeping Wonder’)

Nice new weeping dwarf Maidenhair tree. It does have an upright leader with side branches going horizontal or slightly weeping. Leaves vary from lime green to dark green depending on environment. Characteristics: Sun Exposure – Sun; Annual Growth – 6 – 9 inches; @ 10 years – 5 feet x 2 feet; Color – green; Growth Rate – intermediate; Hardiness Zone – Zones 4-8. When the leaves drop, they drop rapidly, forming a golden carpet around the tree. Ginkgo have no serious insect or disease problems, making it a low maintenance plant. Low maintenance; soil moisture – moist to average, well drained; growth rate – slow; deciduous – fall color.1

Kathy started working with the demonstration tree by uncovering the nebari. The tree was in a nursery container and so she used a chopstick to dig around the base of the trunk, removing top soil to expose the root structure. The nebari is the flair or surface roots radiating from the trunk. Kathy pointed out that you can not really determine the front of your bonsai without uncovering the surface roots. The front of the bonsai is determined by the appearance of the surface roots or nebari and interesting movement of the trunk.

Some of the many branches on the demonstration tree were cut and removed. When cutting roots and branches it is critical to have sharp tools. The cuts must be clean. Branch cuts must be smooth to heal quickly. This is accomplished by using a sharp knife.

The Ginkgo biloba species has a tiny hole in the center of the branches. When cutting the branch this hole is exposed and can rot out from watering and rain. Cut paste is not effective to prevent water from rotting out the cut branches. So, it is important to cut the branch on an angle and to round off any tops or leaders. See images for examples.

Kathy noted that the cuttings from the Ginkgo biloba are easy to propagate.

A number of primary branches on the demonstration tree needed to pulled downward. A guy wire was used to perform this styling feature. A rubber or plastic tubing was serrated so as not to pinch the branch. Copper #16 was inserted into the tubing on one end and wrapped around the branch to be pulled down. The other end of the wire was attached to the side of the nursery container by making a hole in the container. The guy wire technique was considered to be better than wiring the branch.

Another styling technique used on the demonstration tree was to insert tiny pieces of bamboo between two branches, thereby separating the branches so they did not grow too close to each other.

Wiring – Kathy used very little wiring of the Ginkgo biloba. She cautioned against having wiring cuts caused by wrapping wire around the branches too tightly or leaving the wire on the branches too long. Wiring should be loosely wrapped around the branches. Paper can be wrapped around the wire to help protect the branches. The holding period on wired branches depends a lot on the growth of the tree. A watchful eye must be taken to ensure the wiring does not cut into the branches.

Kathy proceeded to remove and thin out branches. This will allow sun light in to the interior of the tree. Remove branches located in the crotches. Kathy suggested not to stay in one place while thinning out the branches. Instead, move around and work in a manner to balance the work areas.

Upon completion of the demonstration, the Ginkgo biloba ‘Weeping Wonder’ was raffled off. The winner was Joanne Lumsden.

1 Internet searches on Ginkgo biloba ‘Weeping Wonder’.

Demonstration by Sensei Kathy Shaner – Juniper

On November 26, 2019, our club Sensei Kathy Shaner performed a demonstration on the styling of a juniper. The juniper demo tree was furnished by Bob Shimon of Mendocino Coast Bonsai, who purchased the tree from Takashi Shimazu at the GSBF Convention 42, Riverside, California, October 24-27, 2019.

The demo showed movement in the trunk and deadwood feature.

Kathy said one should ensure the tree material is well hydrated before working on it. She like the front view which was chosen for its movement and Shari deadwood feature. The front view is always towards the viewer. She described her plans to cut the foliage in order to encourage back budding on branches. The back budding will occur closer in to the trunk and cause the foliage to appear more compact.

Flow or direction of the branches was considered in the styling of the demo tree. Kathy experimented with the angle of the tree to expose a more interesting line and movement.

Wiring the branches is critical in styling any bonsai. Kathy emphasized the correct size or gauge of wire to do the job of controlling the movement instilled in setting branches. If one has doubt, use one gauge lower with copper wire. Kathy said wrap the copper wire loosely around the branches. This will allow for bending and twisting the branches. It will also allow the copper wire to remain on the branches longer and avoid wire cutting into the bark.

In bending branches, Kathy demonstrated exercising the branch first. Just using your fingers and move the branch to be bent up and down or twist side to side. This will make the branch more flexible prior to wiring and bending it. Then wire the branch and set it by bending and twisting the branch in to the position desired. On conifers like the juniper, bend the branches downward. This action will allow more sun light to reach the interior of the tree. One last note on bending branches is to bend or establish movement near the trunk.

Kathy explained the setting of the first, second and back branches. She created a flow or direction of the branches to appear as if the wind influenced them.

Upon completion of the demonstration, REBS member Diane Matzen won the raffle for the demo juniper.

Demonstration by Matthew Walker – Collected Sierra Juniper

This month’s demonstration was performed by Matthew Walker. Matthew worked on a collected Sierra juniper. The yamadori material had been collected three years prior. Matthew shared that these Sierra junipers are found at elevations between 6800’ and 8200’. The tree was presently in a plastic bonsai training pot planted in three equal parts Akadama, pumice and lava rock. Showing its signature blue, green, gray foliage, it was ready for its first styling. The original starting size of the tree was one hand lifting Katade-mochi size approximately 14” wide and 10” tall. The interesting and powerful material was at one point attached to a larger tree. As the styling progressed, the completed tree ended up more compact; ending up in the Komano small size approximately 9” in diameter and 10” tall. As with the first styling of most trees the challenge of finding the front and angle of the tree presented a few options. With ample dead wood and live life lines from the 3” trunk and slightly wider nebari to the curved 4” Y above, the front highlighting theses desirable attributes was determined.

The next decision to be made was the form of a somewhat larger 8” long primary branch curving away from the main trunk and extending parallel about 6” above the soil line. This branch would prove to be a challenge since its connection to the Y and main trunk was showing signs of splitting and being too thick to bend. The verdict was to reduce its length and to jin the branch to approximately 4”. Matthew pointed out that the base of jin should have angles and taper which gives it a more natural look as opposed to a symmetrical ring where it meets the remaining bark. He also mentioned that a torch is a good way to remove smaller splinters and hair like fragments. A wet towel is essential to cover and protect the other parts of the tree while doing so.

As wiring commenced, starting on the lower secondary branches, the yamadori material began to reveal its bonsai identity. Matthew gave many valuable tips on wire bending specifically with how the wire should be wrapped into a slight hook at the end of each limb in order to keep it in place and at the desired direction. Foliage pads were craftfully created with the tips longer than side branches creating five to six tapered fans extending from the gracefully curved trunk.

Matthew reminded us that the apex of bonsai trees can be the most difficult and time-consuming aspect to styling. Referring this part of the creation as the “comb over”, an apex may be made of two or more small branches and compacted for density.

The elegant yet rugged bonsai tree was completed by being placed in its new appropriate angle with its training pot placed in a three-gallon plastic nursery pot at about 45 degrees.

–Steve Triolo

Photos by Diane Matzen