Eric Schrader – Raft Style Bonsai

On October 24, 2017, the Redwood Empire Bonsai Society (REBS) held their monthly meeting and demonstration, featuring Eric Schrader as guest bonsai artist. Eric Schrader is past president of the Bonsai Society of San Francisco (BSSF), San Francisco, California. He is a bonsai grower, artist, instructor, and lecturer.

One of Eric’s favorite topics involving bonsai is the creation of bonsai, whether from seeds, air layering, cuttings, or collected from wild and urban environments. Pros and cons of creating bonsai – pros include starting is fairly simple, variety of species available, relative costs are low over time, control of the environment for growing, and creativity. Whereas, cons include time period is lengthy, crop failure, size, and cost over time.

Eric discussed the various styles – formal upright, informal upright, slant, cascades, grove or clump, root over rock, exposed roots, and raft. All of these styles can be obtained through collecting, nursery stock or growing them yourself. Eric said among his favorite styles of bonsai are the exposed roots and raft.

He spent some time on discussing the differences of development versus refinement in bonsai. Eric described the techniques of both development and refinement. Using the Japanese black pine as an example of refinement, he described cutting and wiring needle branches to gain the desired style of bonsai. He used a juniper raft to describe development of a bonsai by growing it in a somewhat large flat wooden box. Using a juniper young whip plant, one side of the whip has its branches removed. It is then potted in bonsai soil mix having the remaining branches point upward. The root ball at one end and the length of the whip planted with bends from side to side and up and down. Eventually, rooting takes place on the underside of the whip.

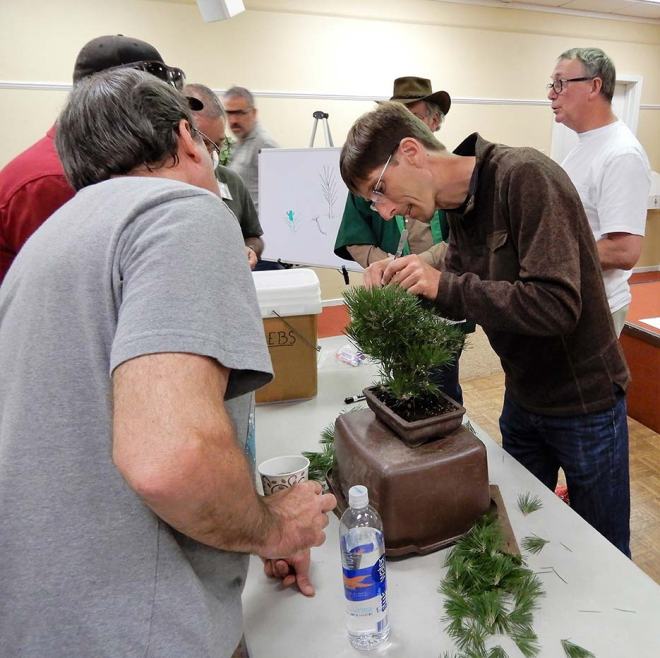
Eric shifted from the juniper to an elm raft he started a number of years earlier. He pointed out the curves in the laying out of the original elm branch. From the original elm branch he allowed an uneven number of branches to grow upward. These upward branches appeared as individual plants. Eric used wire to instill movement in the individual branches. He described having the largest branch in the middle and suggested ways of training and cutting the branches to have the middle branch appear as the largest and oldest tree with the smaller branches (trees) surrounding and off to the side. It does not look natural to have all the branches lined up in a straight line. That is the reason for putting curves and bends in the initial layout of the single whip. Eric placed some wire on the upright branches to give them movement and to control their direction of growth around the centered branch. He did little or no cutting at this time. Eric said he would like to see more growth and girth to the individual branches.

Eric Schrader illustrating the design and layout of a raft style bonsai
Elm raft style demonstration bonsai
Example juniper raft style bonsai
Placement of wire to instill movement and direction of growth
Bob Shimon and Eric Schrader conduct a raffle for the elm raft style demonstration bonsai

There was a raffle held upon completion of the demonstration. Peter Naughton won the elm raft demonstration bonsai.


Rock Plantings by Master Masahiko Kimura

As a follow-on to Randall Lee’s great demonstration for creating a Juniper rock planting on September 26, 2017, I wanted to show some photographs of rock plantings by Master Bonsai Artist Masahiko Kimura of Japan. During the 8th World Bonsai Convention, April 27-30, 2017, at Saitama City, Japan, Kimura performed the first of many demonstrations by Master Bonsai Artists. He chose to demonstrate how he creates a Juniper (Juniperus chinensis ‘Shimpaku’) rock planting. Kimura builds a rock formation using Feather Rock (the landscape boulder is a porous, pumice boulder, sharp and coarse, which is much lighter than most stone). He carves out pockets at various locations and heights where he intends to plant trees. The rock formations are usually formed in a stable, upright position. After carving the rock, Kimura pours a liquid motar cement over the entire rock formation which seals it and makes handling the feather rock easier. The motar cement is colored grey to charcoal. After the motar cement is set, the planting of trees can begin. Muck (Sphagnum moss and clay soil mixture) is used to hold and grow the plant roots. Low carpets or mounds of green Moss are finally pinned in against the muck to hold it in place. Sprays of water are used to keep the plants and muck moist during application and after care.

Photo by George Haas
Master Masahito Kimura’s Shimpaku Juniper demonstration rock planting, 8th World Bonsai Convention, Saitama City, Japan (April 2017)

Other rock plantings by Kimura were photographed at his home and bonsai nursery located near Omiya, Japan.

Randall Lee on Juniper Rock Planting

Front view of juniper rock planting

On September 26, 2017, Bonsai Artist and Instructor Randall Lee of Alameda, California, was the guest demonstrator for the Redwood Empire Bonsai Society (REBS) general meeting and demonstration. Randall chose to demonstrate on how to create a bonsai rock planting.


What I observed first were the preparations Randall undertook for his bonsai rock planting demonstration.

Materials required:
One interesting black lava rock with anchored tie down wires
Several small junipers (Juniperus chinensis procumbens nana)
A variety of companion plants
Plenty of muck (mixed clay and Sphagnum moss)
Sprayer containing water
Turn-table
Aluminum wire
Various bonsai tools
Gloves
Collected moss

Preparations for juniper rock planting

Randall said various kinds of rocks can be used for rock planting, and that you can usually find suitable rocks at bonsai club shows that offer vendors or at local rock landscape material businesses. For the demonstration, Randall chose a black lava rock that was stable enough to stand up vertically and contained a number pockets and crevices to hold the plants. He particularly liked the rock’s peak or top and the cliff like feature for the front. Prior to the demonstration, Randall anchored tie down wires at a number of locations on the front and back sides. To secure the tie down wires to the rock, he used DryLok Fast Plug, a fast setting hydraulic cement product.

Front view
Back view


He was ready to layer the muck (a mixture of moist clay and Sphagnum moss). Randall said the Sphagnum moss comes in long strings which he cuts in shorter sections so that it mixes better with the clay soil. He layered the muck to cover the tie down wires and fill the crevices and pockets. Randall cautioned about leaving air pockets, and so he pressed the muck tightly against the rock. He often sprayed the muck with water to keep it moist during its application. Sufficient muck should be made beforehand so that you don’t run out of it in creating your rock planting.

Applying the first layer of muck to cover tie down wires, pockets and crevices
The first layer of muck covers those locations where plants will be placed on the rock

Randall completed the first layer of muck, covering the tie down wires and locations intended for plants. At this point, he placed one of several junipers on the back side near the top of the rock, exposing the branches in the front, like a cascading tree, and some foliage around the rock’s peak. He tried another juniper in the same location, this time there was less cascading of the branches. After getting the opinion of the audience, Randall decided with the latter juniper showing smaller portions of foliage in the front and back sides of the rock. Randall said he had trimmed some of the roots before the demonstration, but that the roots remained long and at different lengths. He checked the position of the juniper a couple of times to ensure it was as he intended it to be, and then he used the tie down wires to secure the juniper to the rock. He pressed tightly a second layer of muck around the roots. He pushed the muck into place to cover the roots and ensure there were no air pockets. Randall added a second juniper and a few companion plants in the same manner.

First, adding the cascading juniper
The smaller of two junipers was chosen and wired on to the rock
Additional juniper and companion plants were added

Randall explained that high mountain plants were placed towards the top of the rock, whereas lower mountain plants were located near the middle to low parts of the rock. Companion plants were added in the same manner.

Once the above was complete, Randall covered all the muck with moss he collected for the demonstration. In the vertical locations on the rock, he used wire staples made from aluminum wire to insert into the moss to hold the moss in place. After a good spraying of water over the moss and plants, Randall’s juniper rock planting was complete.

Finishing touches with soft wiring and light trimming of branches
All eyes on Randall as he creates the juniper rock planting


Front view
Back view


A raffle was held and member Suzanne Waxman won the juniper rock planting.

“How am I going to carry this rock planting home?”
Suzanne and Randall pose with the juniper rock planting


For reference, rock plantings by Master Noboru Kaneko are covered in the book “Junipers, Bonsai Today Masters’ Series, Growing & Styling Juniper Bonsai” 2007 by Stone Lantern Publishing, pg. 137.

Redwood Empire Bonsai Society (REBS) Meeting & Demonstration – August 22, 2017

Club Sensei Kathy Shaner performed a varied demonstration involving preparations for the upcoming 34th Annual Bonsai Show on August 26 and 27, 2017, and hands-on developing of two species, one being an oak and the other being two trident maples.

Preparations of show bonsai was more a discussion conducted by Kathy and show chair Bob Shimon. Some key steps to take to prepare your bonsai for the show included the most critical one of watering the bonsai a couple of days before bringing the bonsai in to the show venue. The bonsai will be indoors on display from set up on Friday, August 25 through the end of the day on Sunday, August 27. Volunteers will water periodically during the show. However, adequate hydration beforehand will keep the bonsai under minimal stress. Since the show is indoors, it is customary to top dress the soil of your bonsai with moss or a top dressing of very small sieved or screened particles of lava (black, red, brown) rock and Akadama. Avoid white pumice in the mix. This step will make for a clean appearance. When applying moss, try for a smooth and level look, and avoid the appearance of mounds and valleys. Oil the pots (walnut oil) lightly and wipe it dry so that the oil does not mark the paper covered display tables. Clean and wax your bonsai stands or slabs in a similar manner. Take time to look over the bonsai and remove any debris such as dead leaves, branches, spider webs, etc.

Kathy proceeded to work on an oak bonsai. The bonsai was wired in February of this year and it was time to remove the wire. After removing all the copper wire from the oak, she began to look at the tree design. She wanted to style the oak as a semi cascade or slanting tree. The trunk was large and very interesting, but the tree foliage and trunk appeared to like movement in a slanting style. The pot was shallow and not suitable for a slanting tree. Repotting the bonsai would be best done in January of next year. In the meantime, Kathy chose to prop up one side of the tree and root system using chopsticks and adding more soil mix. The slanting position was ideal. Kathy discussed the oak bonsai would require adequate water and full sun. It would be a small to medium size bonsai. She also discussed the fact that a shallow pot holds more water than a deeper pot. If overwatering becomes a problem, you can always prop up one side of a shallow pot to help in drainage. The oak bonsai was potted three years ago. Kathy said a bonsai style should have a story behind it to explain why it was slanting. In this case, the oak bonsai could have been growing near a stream or on the side of a hill. She applied some copper wire to the oak bonsai, lowering some of the branches in a slanting movement. She also removed unwanted branches, but not many. Kathy recommended a round or half-moon pot, but no square pot. In wiring the oak, Kathy demonstrated soft wiring by using her thumb or two fingers to guide the wire wrapped around the branches. This wire can remain in place for some time before cutting in to the bark.

Kathy then switched to working on the two trident maples. She showed how to achieve over time short internodes on the maples by removing the central new forming leaves as soon as they appear and allowing two new buds to form as leaves. This new leaf removal is repeated throughout the growing season in order to form branches with very short internodes. The first trident maple was a single trunk, tall and graceful with its foliage mostly on top, but also lower in the trunk. Kathy cut the top of the trunk off the tree. She ensured the cut was only slightly angled, clean, and flat. There were three buds near the cut to be protected from any damage. She then wrapped and sealed the cut, including the three buds, with parafilm. (Parafilm M Roll, 125’ Length x 4” Width by Parafilm, available through Amazon or medical suppliers.) Kathy said the parafilm will keep moisture in place of the wound, help its healing and help the three buds grow. The buds will pop through the thin parafilm. Over time the parafilm will deteriorate and come off.

Kathy moved on to the two-trunk trident maple. She used a wine cork to slightly separate the two trunks at their bases. She then soft wired the smaller of the two trunks and applied some movement to the trunk. Again, she pointed out that the work went into developing short internodes. She demonstrated that as the weather changes in to the fall season and leaves turn color, it is a good time to remove the leaf leaving the petiole in place. The petiole contains sugars that will feed the root system even after the leaf is removed.

A raffle was held at the conclusion of the Kathy’s demonstration. The winner of the raffle had a choice of between the oak bonsai or one of the trident maples. Mike Nelson won the raffle and chose the oak bonsai as his prize, adding a fine bonsai to his personal collection.

Decandling Pines Demonstration

On June 27, 2017, Redwood Empire Bonsai Society (REBS) held its monthly meeting at the Luther Burbank Art & Garden Center, Santa Rosa, California, with guest bonsai artist, instructor and author Jonas Dupuich, who led a demonstration and discussion on the decandling of pines.

Decandling was defined as the technique for the removal of spring growth (candles) from pines in order to stimulate a second push of growth in the summer months.

The time period for decandling pines is in the middle of the growing season and dependent upon the weather and environmental conditions. For example, in the State of Washington decandling will take place in early spring (May, June), and in the State of Texas it would take place later in mid-summer (late June, July). In the San Francisco/Bay Area, decandling usually is done in early June and July. Timing relates to the amount of growing season remaining after decandling to help the second push of new growth.

Jonas discussed the purpose of decandling pines as follows:

1.  Stimulate back budding
2.  Improve branch density
3.  Shorten internodes
4.  Regulate vigor
5.  Promote balance
6.  Reduce needle length

Continue reading Decandling Pines Demonstration