On October 24, 2017, the Redwood Empire Bonsai Society (REBS) held their monthly meeting and demonstration, featuring Eric Schrader as guest bonsai artist. Eric Schrader is past president of the Bonsai Society of San Francisco (BSSF), San Francisco, California. He is a bonsai grower, artist, instructor, and lecturer.
One of Eric’s favorite topics involving bonsai is the creation of bonsai, whether from seeds, air layering, cuttings, or collected from wild and urban environments. Pros and cons of creating bonsai – pros include starting is fairly simple, variety of species available, relative costs are low over time, control of the environment for growing, and creativity. Whereas, cons include time period is lengthy, crop failure, size, and cost over time.
Eric discussed the various styles – formal upright, informal upright, slant, cascades, grove or clump, root over rock, exposed roots, and raft. All of these styles can be obtained through collecting, nursery stock or growing them yourself. Eric said among his favorite styles of bonsai are the exposed roots and raft.
He spent some time on discussing the differences of development versus refinement in bonsai. Eric described the techniques of both development and refinement. Using the Japanese black pine as an example of refinement, he described cutting and wiring needle branches to gain the desired style of bonsai. He used a juniper raft to describe development of a bonsai by growing it in a somewhat large flat wooden box. Using a juniper young whip plant, one side of the whip has its branches removed. It is then potted in bonsai soil mix having the remaining branches point upward. The root ball at one end and the length of the whip planted with bends from side to side and up and down. Eventually, rooting takes place on the underside of the whip.
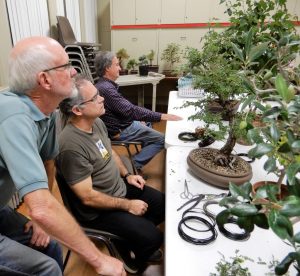
Eric shifted from the juniper to an elm raft he started a number of years earlier. He pointed out the curves in the laying out of the original elm branch. From the original elm branch he allowed an uneven number of branches to grow upward. These upward branches appeared as individual plants. Eric used wire to instill movement in the individual branches. He described having the largest branch in the middle and suggested ways of training and cutting the branches to have the middle branch appear as the largest and oldest tree with the smaller branches (trees) surrounding and off to the side. It does not look natural to have all the branches lined up in a straight line. That is the reason for putting curves and bends in the initial layout of the single whip. Eric placed some wire on the upright branches to give them movement and to control their direction of growth around the centered branch. He did little or no cutting at this time. Eric said he would like to see more growth and girth to the individual branches.


There was a raffle held upon completion of the demonstration. Peter Naughton won the elm raft demonstration bonsai.